Affiliate Portal
As an Authorized Affiliate, your Affiliate Portal is where you will create & manage accounts for all your Projector Users. We use the term User to refer to anyone you are managing as a Projector customer. Using your Portal is the only way we can track your Users for your commission.
Affiliate Portal Access Process:
When you are logged in to your Projector account, the Affiliate Portal is called User Management
- Log in to your Authorized Affiliate Projector Account
- Access User Management from the main menu (top right-hand corner)
- When you are in User Management, you are in your Affiliate Portal
- User Management is the location where you will conduct all User account creation & management

Create New User Account Process:
- Sign into your Authorized Affiliate Projector account and navigate to User Management
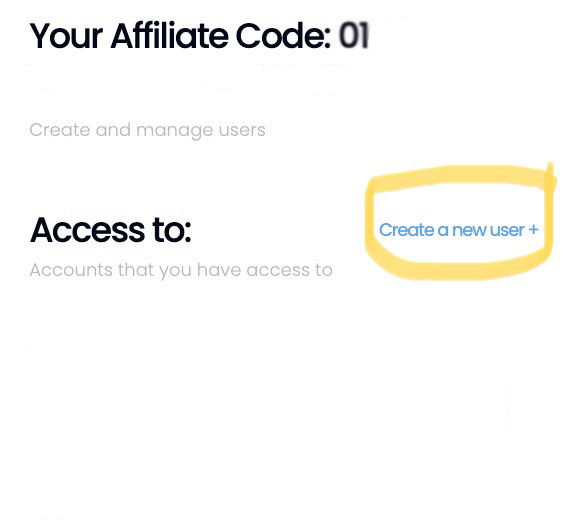
- Click on “Create A New User +” (plus sign) on the far right side
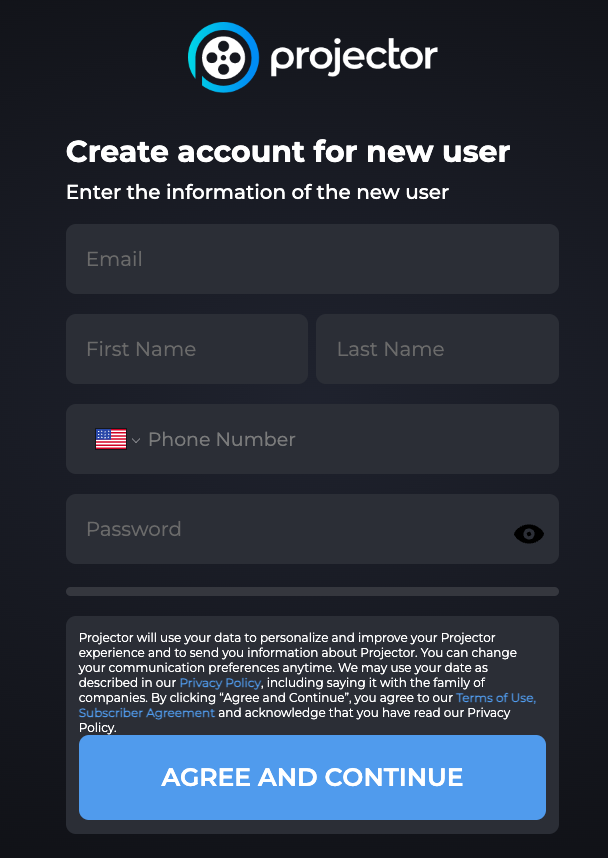
- Enter the information for the new User as follows:
- Your User’s email address
- Your User’s first & last name
- Your User’s phone number
- A temporary password that you assign (note this temporary password for your User to login)
- Click “Agree and Continue”
Add Payment Method Process (you have four options):
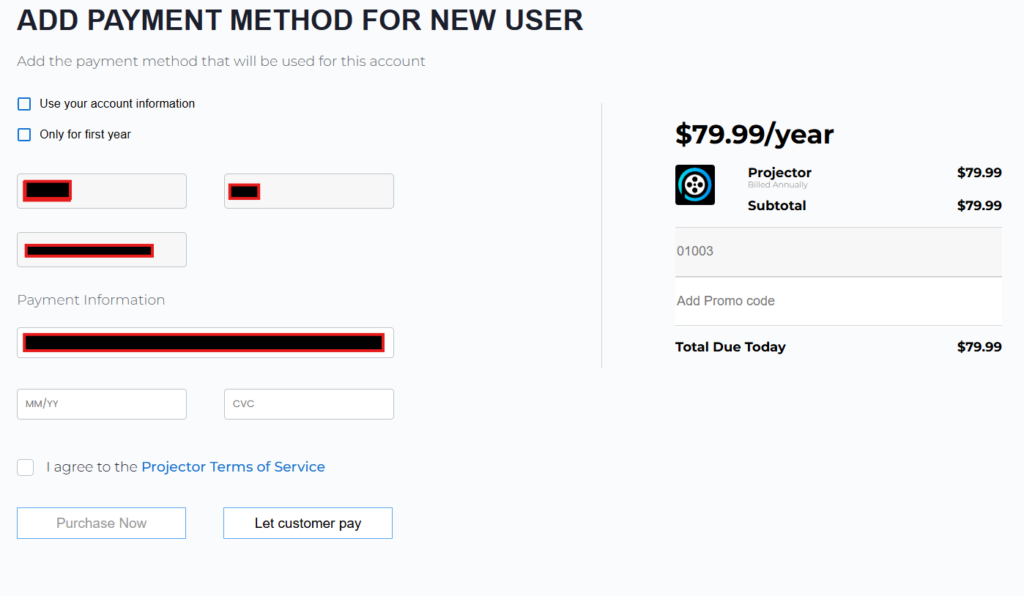
- Payment Method Option One: Enter User’s credit card
- You have your User’s credit card information and enter it
- Click the agree to the Projector Terms of Service
- Select “Confirm Payment”
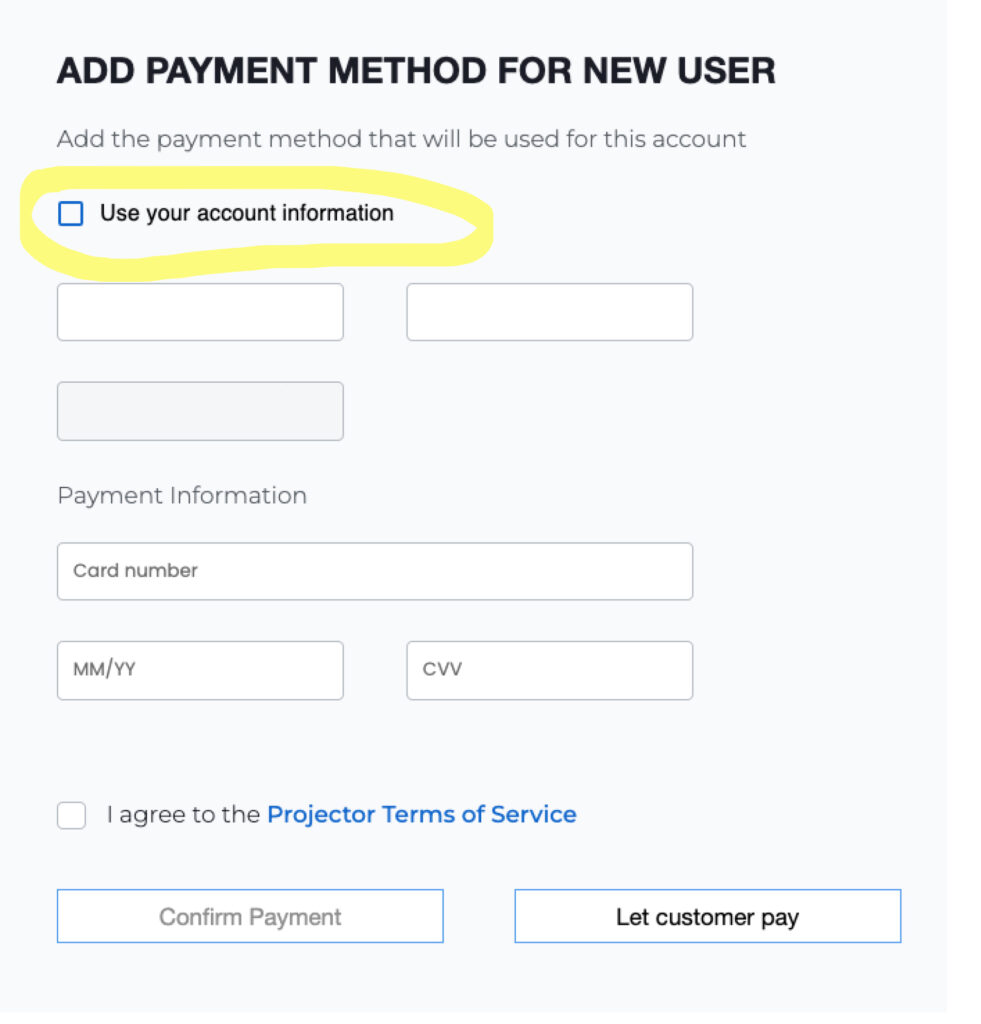
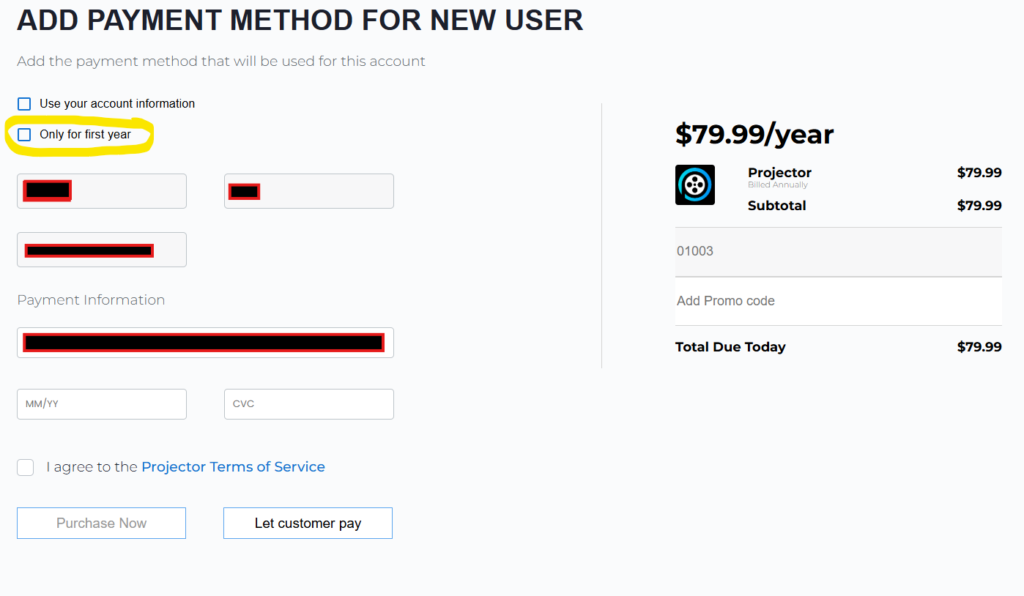
- Payment Method Option Two: You pay for the User’s subscription
- Click the check box next to “Use your account information”
- Click the agree to the Projector Terms of Service
- Select “Confirm Payment”
- Your credit card stays on file for renewal until a new card is input
- Payment method Option Three: You pay for the User’s subscription only for the first year. Your credit card stays on file for the first year only then will need to be replaced with another card before renewal.
- Click the check box next to “Only for first year”
- Click the agree to the Projector Terms of Service
- Select “Confirm Payment”
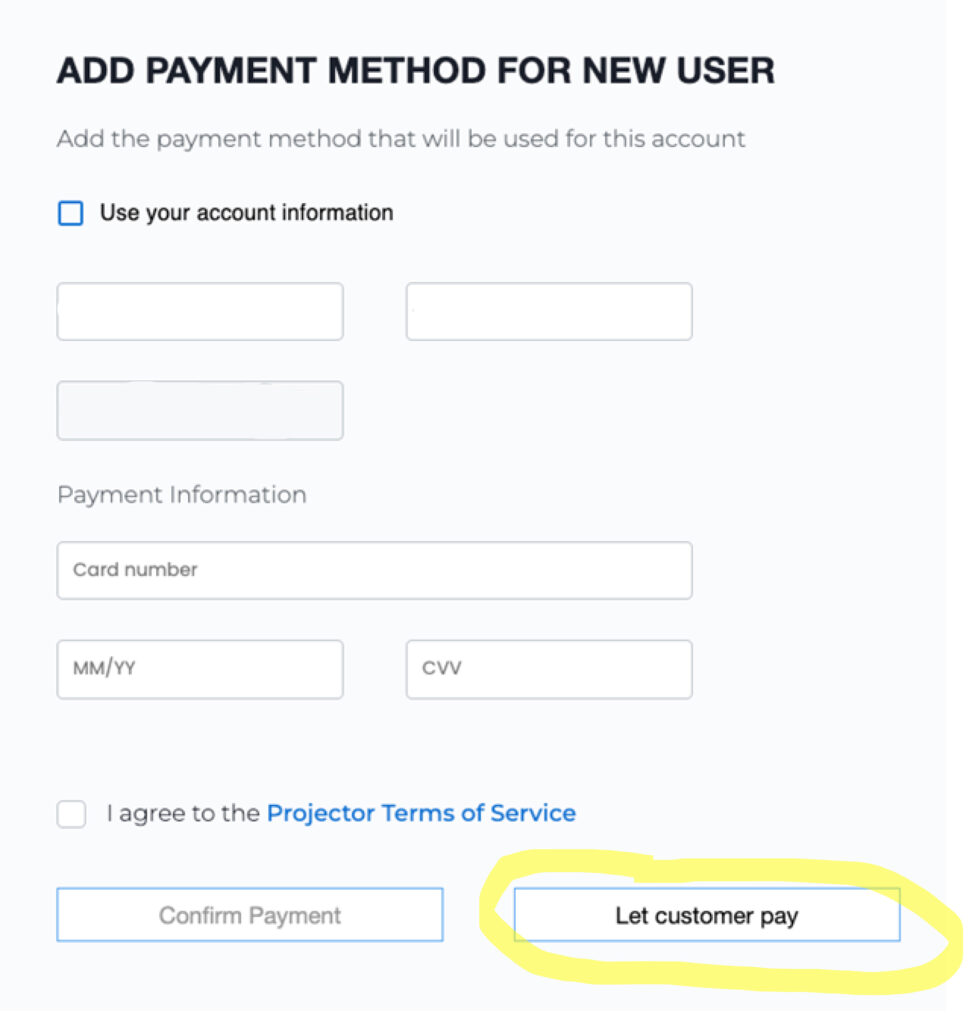
- Payment method Option Four: User enters their own credit card
- Select the “Let customer pay” at the bottom of screen
- Contact your customer to give them their username and temporary password so they can login on their computer and add their own payment
- Instruct User to login. Direct your User to go to Account Settings on top right hand menu. Select Account Settings>Billing & Payments>Manage Payment Info
User Management: Your Authorized Affiliate Portal
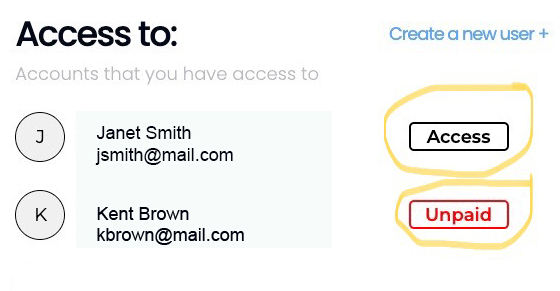
User Management is where you will see and access all your User’s accounts.
When the User account is paid you will see their name and “Access” button to the right of their name in black. Selecting the “Access” button gives you access to manage their Projector Account.
When the User account has been created, but not paid, you will see their name and “Unpaid” button to the right of their name in red. You will not have any access to manage their Projector Account until the account is paid and a credit card on file.
It is important to remember that when you are in your user’s Projector Account any uploading & management will be in their account until you select “Exit”. Once you select “Exit” it will bring you back to your Projector Content Dashboard.
- Selecting the Content Dashboard button will bring you to the User’s Projector Dashboard. This is where you will build & design the User’s Projector Account. You will find the following Tabs in the Dashboard on the left hand side.
- Content Tab
- This is where you access & manage the User’s Videos, Photo Albums and Drafts
- The “Videos” tab shows all the videos that have been uploaded & published to their Projector
- The “Photo Albums” tab shows all their photos that have been uploaded & published to their Projector
- The “Drafts” tab shows all the videos that are in process of being uploaded. They will stay in Draft until they are published
- Published means the video has been completely uploaded, processed and assigned a Title, Thumbnail, Category & Visibility
- This is where you access & manage the User’s Videos, Photo Albums and Drafts
- Layout Tab
- Choose & edit the order of the User’s content
- Set the User’s Photo Albums settings when playing photo albums
- Select on a Category to edit the order of videos of that Category as well as change the name and background of the Category
- Add new Categories & Playlists
- Edit the order that Photo Albums, Categories & Playlists are displayed
- Viewers Tab
- Manage the User’s Viewers
- Invite others to view their Projector. The invitee will receive an email notification of the invite. If they are not an existing Projector user, they will need to create an account. They will not have to pay for their account unless they choose to build their own Projector (upload content). As an Affiliate, you may choose to create the invitees new account to ensure you get credit if/when they decide to want to have their own Projector (uploaded content). You may choose to create all the invitees accounts to make the process easier. For more information on viewers see the detailed Visibility section
- Manage the User’s Groups
- Groups can be created if the user wishes to share only select content with certain groups of viewers (i.e. Nieces & Nephews or High School Friends) for more information and how to create Groups see the detailed Create Groups section
- Manage the User’s Successors
- This is where the user can choose to set a Successor of their Projector if and when needed. For more information see the detailed Successors section
- Manage the User’s Viewers
- Settings Tab
- Access the Users:
- Account Settings
- Notifications
- Billings & Payments
- Privacy Statement
- Terms of Use Statement
- Subscriber Agreement
- Access the Users:
- Content Tab
It is important to know that you may not be managing these certain areas for your user. Your user may choose to manage these areas themselves, but may look to you for help in defining what these areas mean.
Business Affiliate Account for Customer Demos
As an Affiliate you can use your Projector Business Account as a Demo Account to show customers how Projector works. You can choose to upload your own content or use our sample content. Please contact [email protected] to request sample content.