All-In-One and Paid Subscriptions
Projector Accounts: All-In-One and Paid Subscriptions
Turning files into family TV by uploading to your user’s Projector is simple, straight forward and with choices for getting your customer started. As a Projector Affiliate, you can decide how hands-on you want to be when setting up your customer’s Projector account.
There are two types of Projector Accounts: The All-In-One Quick User and Paid Subscription.
The Quick User feature in the Affiliate Portal is what we call the All-In-One Platform
Quick User is a delivery and access feature designed for affiliates who need a fast, professional way to deliver all files – videos and photos – to a client without requiring upfront signup or payment. There is no distinction between delivery vs storage. Everything is treated as a secure Projector destination.
The All-In-One Quick User Account
What Is a Quick User
A Quick User is a lightweight user profile created by an affiliate for file delivery.
- No upfront payment
- No immediate subscription
- No technical setup for the end user
- Files live securely in Projector
- User decides later whether to keep access
Think of it as “deliver now, decide later.”
A Quick User acts as a temporary cloud storage + streaming workspace
- Access is free for 30 days
- Affiliates upload files directly to a user
- The user receives an email when files are ready
- Files can be downloaded to a local computer
- Files can be streamed and viewed in Projector
After 30 days, continued access requires a Projector subscription. This converts the delivery into a seamless, continuous archive and personal streaming destination.
Quick User is ideal for:
- Event delivery (weddings, memorials, birthdays)
- Media handoff (videographers, photographers)
- Personal cloud storage with optional streaming
- Long-term memory preservation, not just file transfer
Why This Matters
For Affiliates
- One-click delivery
- No file size limits or USB drives
- No follow-up logistics
- Built-in upsell without pressure
For End Users
- No forced signup at delivery
- Time to download or explore
- Optional long-term value
- One place for memories, not scattered files
Key Takeaway
Quick User turns file delivery into ownership.
It’s not just sending files, it’s giving clients:
- A personal archive
- A streaming experience
- Time to decide what those memories are worth
Positioning the All-In-One to Customers
Simple verbiage to include on your website, in marketing material and when speaking to customers:
- Delivery via Projector Stream: We deliver your media files through Projector Stream, a private destination specifically designed for home movies and personal videos.
- Easy Access: When your project is complete, you’ll receive an email with your Projector Stream link to access your media files.
- Private Storage & Streaming: Projector Stream provides private cloud storage with instant streaming to your TV, ensuring your media files are safe and easy to watch.
- 30 Day Availability: Your complete media collection will be available for secure download and backup for 30 days. As a special preview, up to 15 files (5 GB total) will also be available for private sharing and streaming on your TV and devices, so you can experience the Projector platform before upgrading to full access.
- Protect & Grow Your Memories: Turn your Projector delivery account into a permanent, private home for your memories so you can keep streaming, add more anytime, and know everything is safe for years to come.
Charge for your uploads:
- Charge as you would for thumb drives. As a sample:
- $10 for up to 16gb
- $20 for up got 64gb
Add a note in your Invoice Template to remind customers about their 30-day terms:
- Your Projector link will remain active for 30 days and includes up to 5GB of streaming access during that time, giving you a chance to experience your restored memories on the big screen. To keep your memories protected and continue growing your collection beyond the 30-day preview, we recommend upgrading to Projector’s simple Protect & Grow plan before access expires.
Process Guide: Setting Up a Quick User
Watch Tutorial
Step 1: Create a Quick User
- Go to User Management within your Affiliate Portal
- Click “Create a new user”
- Click “Quick User”
- Enter Email address (required)
- Click Agree & Continue
This instantly creates a private destination for file delivery.
Step 2: Upload Files
- Click on Upload
- Choose what you are uploading
- If you choose to use the Quick User default upload settings, nothing further is necessary in the upload process except to click Publish
Quick User Default Settings
- Video Title: the file name already assigned to the video file
- Category: All Videos
- Visibility: All Viewers
- Thumbnail: Six images are auto-generated, the system chooses thumbnail #1
Step 3: Publish & Process
- Click Publish to start the upload process
- Files will upload and then process
- The “bell” Notification icon in the upper right corner near the profile picture will list the files as “completed successfully” as each file uploads & processes
Once upload completes:
- Files are securely stored in Projector
- Streaming previews are prepared
- Downloads are enabled
The user does not need to take any action during this phase.
Step 4: Send Email Notification to User
When you have completed uploading, you can notify your user their files are ready with an auto-generated message from Projector
- Click on the email icon (the envelope) next to the User name
- the email message:
- Notifies the User their files are available
- Provides secure access
- the email message:
Sample of the Auto-Generated Welcome Letter
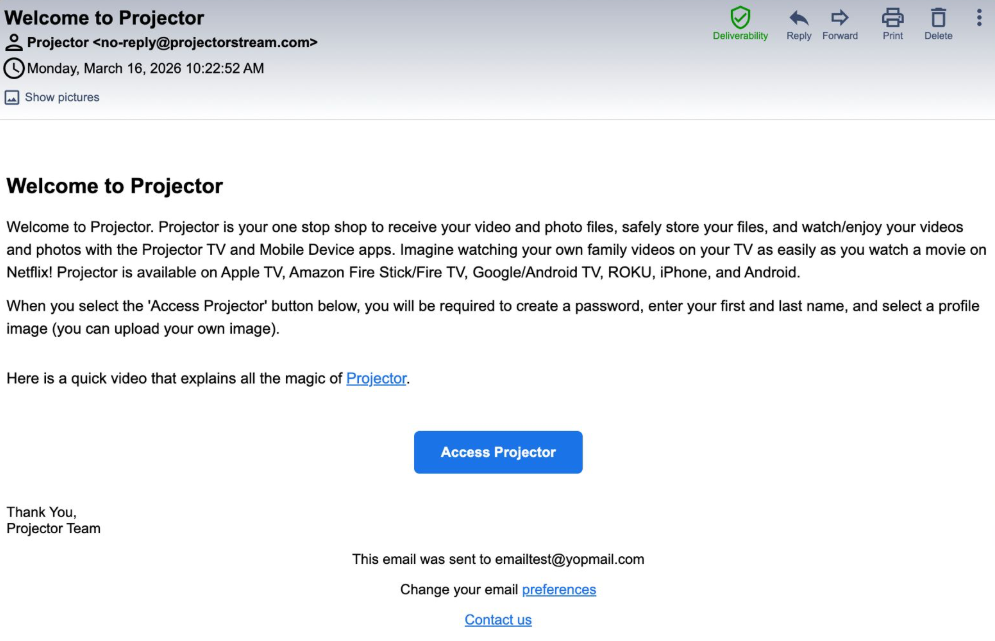

Next to the email icon is the “copy” icon. This allows you to copy the link to your customer’s auto-generated Welcome Letter with their “Access Projector” button so you can manually send to your customer if desired.
The “Access Projector” button will take your Quick User to the “Congrats Your Account Is Ready” page:
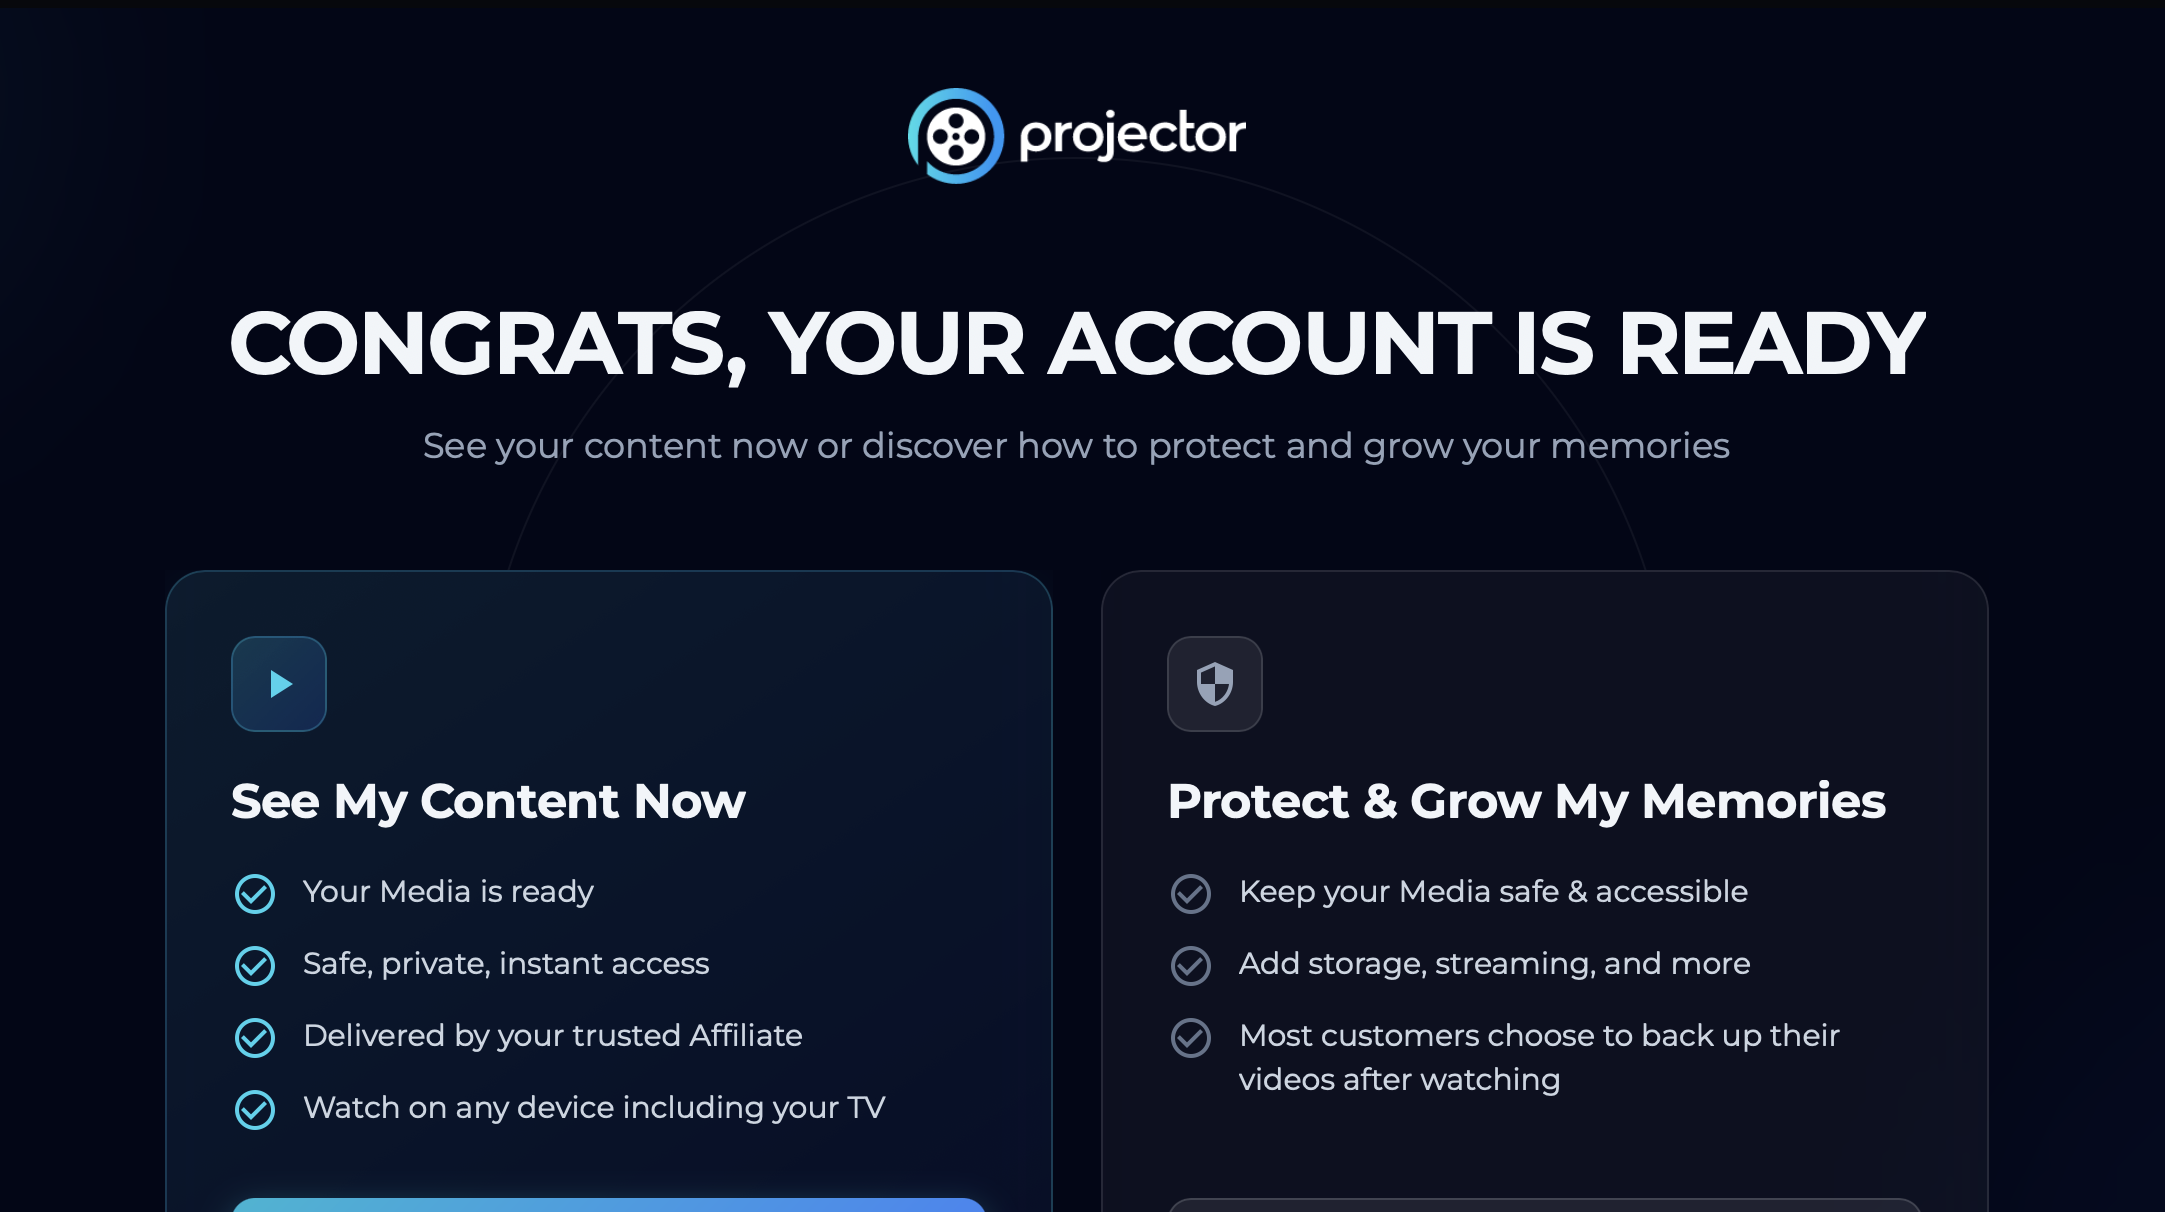
This allows your customers to go directly to their Content Tab and also allows your customers to go to the Projector Protect & Grow landing page where they can learn how and why to upgrade.
Step 5: 30-Day Free Access Period
For 30 days, the Quick User can:
- Download all files to their local computer
- Stream videos and view photos in Projector
- Use Projector as personal cloud storage
- Share the experience privately with family (view-only)
No payment required during this window.
Step 6: Subscription Required After 30 Days
After 30 days:
- Files remain safely stored
- Access is paused until a Projector subscription is started
With a subscription, the user can:
- Retain permanent access
- Continue streaming on TV and devices
- Keep files archived long-term
- Add future uploads for themselves
Understanding Quick User vs. Paid Subscription Accounts
- Paid Subscriptions with White Glove Service and Custom Upload Settings – A more personalized, paid option where you handle the upload process for your customer. Custom settings let you organize files, add detailed titles, and create a tailored look for their Projector Home Screen. This approach provides added value for your customers and delivers a premium experience with service & subscription charges and therefore a credit card is required.
- Paid Plan details:
- Subscriptions are Monthly, Yearly and Lifetime
- 30-day limits do not apply like they do with Quick User
- Paid Plan details:
The following are suggestions to help you with your workflow process. This is to help assist you with being as efficient as possible with your valuable time. We are committed to create additional tools over time to help with your efficiency.
The User’s Projector can be chronological or thematical, or even a combination, depending on their wishes You can opt to do it all for them, or just get them started. Whichever route you choose we recommend charging your User for time & labor just as you do for the other services you offer. We will discuss specific ways of how to price for this in the Positioning Module.
Paid Subscriptions: Offering White Glove Service
- Determine the title for each video or ask for a list of titles for the videos and photo slide shows if you will be providing those naming services. The Title is tagged to each video and will be visibly attached to that video so you will want to make each title unique. You can opt to create a numbering system for each video instead of specific theme names. Titles can be edited by the User afterward.
- We suggest assigning the titles prior to the upload because Projector will auto-populate the title of the video with the name you’ve given each video file
- Here are some examples of how to name your video files:
- Start the name with the year to put them in chronological order
- Start the name with a number: 01, 02, etc. to put them in numerical order
- Start the name with a number first followed by:
- Year
- Theme
- Family name
- Family member name
- Here are some examples of how to name your video files:
- We suggest assigning the titles prior to the upload because Projector will auto-populate the title of the video with the name you’ve given each video file
- Determine if you will be uploading to the default All Videos Category or creating Custom Categories.
- All Videos is the default Category. Videos uploaded into custom categories will also show up in the All Videos category. Videos can be moved into Custom Categories by you or the User afterward.
- The reason to choose uploading to the All Videos Category:
- The ability to upload quickly using default settings
- Set up your User for streaming and sharing right away without the need to provide any other categories or custom details
- Allow the User to immediately take over the account to manage, edit and upgrade to an Unlimited account on their own
- The ability for you to step away from the process knowing the Projector Team will take over with customer service and Help Center services
- A Custom Category is the ability to put a series of videos under certain subject matters. (i.e. Birthdays, Holidays, Sports). Categories can be edited by you or the User afterward. For custom Categories we suggest asking the User for a list of Categories.
- The reason to choose Custom Settings:
- Affiliates use custom settings to give customers a personalized Projector experience.
- Custom uploads let you organize files, add titles and descriptions, and arrange the library to match the customer’s preferences.
- This creates a professional, tailored Home Screen and adds value for the customer.
- Affiliates are paid for this service, custom uploads provide a higher-touch, premium experience while ensuring the customer’s library looks just the way they want.
- Determine the user’s Visibility. This setting determines which viewers can watch videos & photo albums. The default setting is Public, meaning anyone the User shares their Projector with will have viewing access to these videos. Visibility can be edited by you or the User afterward.
Getting Started with Video Uploading
- Log into your Projector account
- Click on your profile to access User Management
- This will bring you to your Affiliate Portal and you will see a list of accounts you can access
- Choose the customer account you want to access
- Click on the Upload button located in the center of the screen or in the upper right hand corner
Upload Automatically or Customize with Ease
1) Video Uploading: Auto Settings
Drag & Drop or select the video file(s) to upload
The “Videos will be published…” box will open:

- The Thumbnail, Video Title, Category and Visibility will auto-populate to all the default settings for all videos. The “All Videos” category is the default.
- Click “Publish”
- Remember to keep your browser open until all videos have finished uploading & processing
- Click “Publish”
2) Video Uploading: Custom Settings
Drag & Drop or select the video file(s) to upload
The “Videos will be published…” box will open:

- The Thumbnail will auto-populate but can be edited after Publishing
- The Category can be individually selected for each video if you have already created a custom category
- The Title and Visibility can be changed individually
- Click “Publish”
- Remember to keep your browser open until all videos have finished uploading & processing
Editing Video Details After Publishing
- Go to the Content Dashboard within the Projector account you wish to add/edit
- Click on Content
- Choose All Videos or the specific Category the video you want to edit is located
- Check the box next to the video you want to edit
- The Video Selected Box appears for editing

- Click “Edit” on the far right hand side of the screen under the thumbnail of the video you selected
- This is where you can also delete the video if applicable
- The Details Box appears for editing & adding details

- A new Title and/or Description can be edited or added
- A new or custom Thumbnail can be added
- Click Next to edit & add more details

- Category, Sub-category and playlist can be edited and/or added
- Click Next

- Visibility can be changed here
- Click “Publish” to re-publish the video with all the edits and/or additions made
About Visibility
The following are the descriptions of our Visibility settings:
“All Viewers“
By selecting this option for your uploaded video or photo album, all viewers your user invites will have access to view this content.
“Only I Can View“
By selecting this option for your uploaded video or photo album, only the user of the account can view this content. No viewers will be able to view this content.
“Choose A Group To Share With“
By selecting this option for your uploaded video or photo album, only viewers who are added to the assigned groups will have access to view this content
Because Projector is a private library meant mostly for family and close family friends, we suggest selecting “All Invited Viewers Can View” unless there are specific videos you want to avoid sharing with all your Viewers. If all content is assigned to “all invited viewers can view”, this will share the user’s entire Projector. For more information on Visibility see the Visibility section
Optional Video Organization
Content Layout: Optional Fields: Description, Sub-Category & Playlist
- Description
- Add details beyond the title & category for further sorting & searching capabilities
- The Description field is limited to 150 characters
- Sub-Category
- Add a sub-category for better sorting & searching
- The Sub-Category field is limited to 17 characters
- Playlist
- Add videos to playlists playing videos within certain sort criteria